Sunday, September 23, 2018

How to Connect your Converted WIFI Sonoff to your Garage Door Opener

So I originally purchased the Sonoff Wifi Switch to control my garage door opener.  When I received it, I realized that it passes power though it.  This won't work for your garage door opener.  You'll need to modify the Sonoff Wifi switch.  If you haven't already done this, please start with my article on How to Convert a WIFI Sonoff into a Dry Contact.  If you don't, you'll most likely fry you r garage door opener.


Step 1:  Start by making sure that your garage door will support being closed with a simple contact.  Most garage door openers will support this but I have heard of a few that use encoded buttons for the wall.  Most garage door openers just have a momentary button that closes a contact when depressed.  Our modified Sonoff will do the same thing.  You can test this by using a wire to jump the terminals on your garage door opener between COM and WALL or something to that effect.  You may need to find your manual if it is not readily apparent.  You're looking for the wires that go to your wall switch.

Step 2:  Connect your Converted WIFI Sonoff Switch on the dry contact side to your terminals that you found in Step 1.

Step 3:  Connect your power to the left terminals on the Sonoff and plug in your device.

Step 4:  Test your unit.  Make sure to always turn the unit back off after activating or your garage door will not work from any other source.  This is a downside since the app that Sonoff uses is eWeLink and it doesn't support momentary operation.  The manufacturer said it may come down the line but it's not here yet.  You can now control your garage door with your Sonoff from anywhere in the world that you have internet.

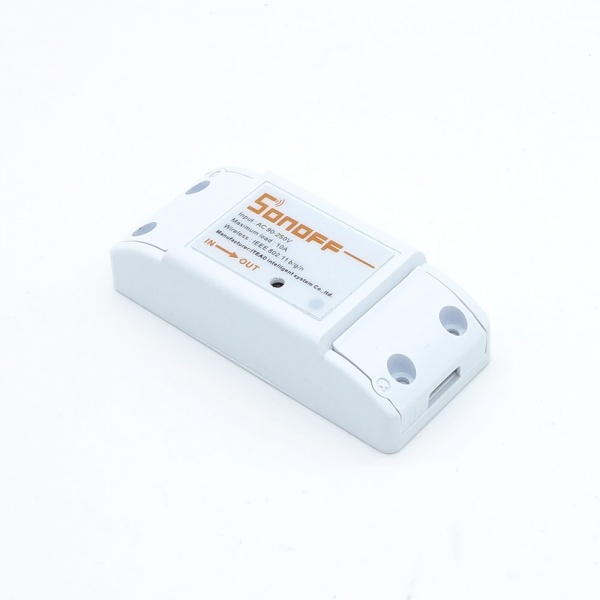
How to Convert a WIFI Sonoff into a Dry Contact

So I ordered one of these Sonoff Wifi Switches off of Amazon. The idea is pretty neat. For around $10 you get a WIFI connected switch that you can control with your phone.


The problem:

I wanted to control my garage door with the Sonoff Wifi Switch but found out that the device passes power through it instead of just closing a contact.  Despite many requests on the manufacturers website forum they have not made the change yet.


The solution:

You can convert the Sonoff Wifi Switch into a dry contact with a Soldering Iron, some Solder and a Cheap Dremel.

Danger:  Make sure the unit is not plugged in before continuing.

Step 1:  Run your finger nail around the base of the unit to separate the cover.  I keep my nails really trimmed so I used a small flat head screwdriver.  It's fairly obvious where the seam is but if you can't find it, leave a comment and I'll add some pictures of the process.

Step 2:  Removed the circuit board.

Step 3:  Removed the pathways with the Dremel from BOTH sides of the circuit board as shown in the picture below.  Hold it up to that light as shown to make sure you did not miss any of the connection.  If you're gap is too small the voltage will make the jump.


Step 4:  Solder across the gap as shown so that the connection will actually close when the relay switches.  You should be able to see what I'm talking about in the picture below.  You can see the solder pointed to by the red arrow.  If you can't get the solder to stretch that far, you can use a single strand of copper from a stranded wire to give your solder something to hang on to.


Step 5:  Test your product with a voltage meter to make sure it all went as planned.

List of parts and tools to complete project, each link is to Amazon with 2 day shipping:

Sonoff Wifi Switch
Soldering Iron
Solder
Cheap Dremel.

Disclaimer:  Use your own judgement or that of a professional.  Not mine.  I'm not responsible if you get yourself shocked or worse.  If it works out great, I'll take the credit for that.

I hoped this guide helped.  Please comment if you like it, even a simple thanks helps.  If you need more detail, let me know by posting a comment.

Now that you're done with the conversion you may wish to checkout How to Connect your Converted WIFI Sonoff to your Garage Door Opener.

How to make a Sonoff TH16 into a Dry Contact


I was asked about making a Sonoff TH16 into a Dry Contact.  This is what I came up with after looking at the schematics.  I HAVEN'T TRIED THIS MYSELF!  I think it'll work though.  As always, do at your own risk!

1. Use a Dremel to etch around the pin on the relay switch so that when the relay is energized we don't have power go the the L1 out terminal.  Make sure you still leave a sliver to transmit power around the etch.

2. Run a line to the "G" terminals.  This will make it so that this switch no longer has a ground but you probably don't need one if you just need this to be a dry contact.

3. Use the L1 out and the G terminals as your dry contact terminals.

4. Let me know if it works!


Saturday, March 18, 2017

How to Hang Pegboard


The first time I hung some pegboard in my garage I started to think about the best way to do it.  I knew that there were options like the DuraHook kit from Amazon but they're about $9 and you'd have to wait for them.  If you want to go this route anyway I've included a link here.
Instead of using the pegboard hook I used some 1/2" PVC.  It works great.  Just cut the PVC into uniform sizes using a PVC cutter.  I made mine about 3/8" long.  You're hooks don't need too much space to be installed.
After you get enough cut (I did about 8 for a 4' x 8' pegboard) you'll need to find and mark the studs.  Use you stud finder and start in a spot on the wall without a stud.  You can tell by tapping on the wall.  It should sound like you're hitting a hollow spot.  Activate the stud finder and slowly move it until you find the beginning of the stuff and mark it.  Then mark the end of the stud.  Now make a different mark in the middle of those lines.  This is were you want to screw your pegboard into.

After you get the places marked you can actually hand the pegboard.  In the picture you can see that I used the PVC as a spacer.  After that you're done.  Hang your hooks and make it look great.